
Your phone is a camera, a sound recorder and a film studio, all in one pocket. With it you can take a photo of your school’s Science Fair, record your grandmother telling a story from her childhood, and make a one-minute video of Sports Day that your whole class watches to the end. Many people make these things every day. A few make them well: the photo is bright and sharp, the voice is clear, the video is short and easy to follow.
In Grade 7 you learned what these things are made of: a photo is a grid of pixels, each one three numbers, and a sound is a long list of samples. In this unit you use that to make them better. You will edit a photo’s light and color and see what happens to its numbers, crop and straighten it, and squeeze it under a form’s size limit without ruining it. You will record a voice that is easy to hear, cut a short video with captions and music you are allowed to use, and put words on a picture so everyone can read them. And you will decide how to share your own work, and give others the credit their work deserves.
Editing a photo’s light and color
Open a photo on your phone and press Edit. You will find sliders called Brightness, Contrast, Saturation and Warmth, or something like them. What does a slider actually do?
Remember what a photo is: a grid of pixels, and each pixel is three numbers from 0 to 255, for its red, green and blue light (Grade 7, Colors from numbers). Every edit is arithmetic: the editor takes each pixel’s three numbers, does a small calculation, and writes new numbers back. It does this for every pixel, millions of times, in a blink.
- Brightness, in its simplest form, multiplies all three numbers. Times 1.2 makes the whole photo lighter; times 0.8 makes it darker.
- Contrast pushes the numbers away from the middle, 128. Dark pixels get darker and light pixels get lighter, so the photo looks crisper. Less contrast pulls everything towards gray, as on a foggy day.
- Saturation (we call it color on the slider below) pushes each pixel’s three numbers apart from each other, so reds get redder and blues bluer. Turn it right down and the three numbers become equal: gray. A photo with no saturation at all is black and white.
- Warmth (also called white balance) raises the red number and lowers the blue, or the other way round. A photo taken in the shade often comes out too blue; one under an ordinary bulb, too orange. Warmth puts it right.
A useful picture of a photo’s light is its histogram: a graph of how many pixels have each brightness, from black on the left to white on the right. A dull, hazy photo has all its pixels bunched in the middle. A photo with good contrast spreads them from near black to near white.
Look at what happens when you push too far. A number can’t go above 255 or below 0, so the editor stops it there. Pixels that were a little different from each other, the light part of a cloud and the slightly lighter part beside it, all end up as exactly 255, 255, 255. The detail that told them apart is gone, and no slider can bring it back. Photographers say the highlights are clipped (or “burnt out”). In the histogram, it shows as a tall spike at the very end.
You increase a photo’s contrast. What happens to a pixel that was 200, 200, 200 (light gray)?
Pick an answer to see why.
After brightening a photo of a white temple, the temple’s walls are a flat white with no detail. What happened?
Pick an answer to see why.
A better photo to start with
No slider can rescue a photo that is blurred, or so dark that it is mostly noise. A little care while you take it saves a lot of editing.
- Light on the face. Stand so the light falls on what you are photographing: the window, or the sun, behind you or to one side, not behind the person. A face in front of a bright window comes out as a dark shape.
- Hold still. Hold the phone with both hands, elbows against your body, or lean on a wall. In poor light the camera keeps its shutter open longer, and any shake blurs the photo.
- Tap to focus on what matters. The phone sharpens that part, and sets the brightness for it.
- Walk closer instead of zooming. On most phones, zooming in past the lens’s own zoom only crops the photo and blows up the pixels that are left: you lose detail. Your feet are the better zoom.
- Wipe the lens. A phone lens lives in pockets and bags. A fingerprint on it makes every photo look misty, like the one you just edited.
- Look at the edges before you press. Is there a pole growing out of someone’s head, or half a person at the side?
Crop and straighten
Every editor has a crop tool: a box you drag over the photo, and everything outside it is cut away. You met cropping in Grade 6 as the way to make a picture fit a space without stretching it Grade 6: Pictures that help. Cropping also makes a better photo:
- Cut away what doesn’t matter, so the eye goes straight to what does.
- Choose the shape the photo will be shown in. Each shape is written as width : height, its aspect ratio.
| Shape | Aspect ratio | Where it is used |
|---|---|---|
| A phone’s photo | 4 : 3 or 3 : 2 | as the camera takes it; prints |
| Square | 1 : 1 | profile pictures, many online forms |
| Tall | 4 : 5 | posts on social apps, seen on an upright phone |
| Wide | 16 : 9 | a video, a computer screen, a slide |
A tilted photo, where the horizon or a building leans, looks wrong straight away. Straighten turns the photo back. The editor then has a problem: turned, the photo no longer fills its rectangle, and empty triangles appear at the corners. So it zooms in just enough to hide them, and a thin strip is cut off every edge.
Where in the box should the subject go? Many photographers use the rule of thirds: imagine two lines a third of the way across the photo, and two a third of the way down, as the crop tool draws them. Put the subject where two lines cross, rather than in the very middle, and a horizon along a line rather than across the center. It isn’t a law, and a face looking straight at you is often best in the middle. But try it, and see which you like.
Cropping throws pixels away. A photo cropped to half its width and half its height keeps only a quarter of its pixels, and if it is then shown big, it looks soft or blocky. So crop when you have pixels to spare, and don’t crop a small photo hard.
Pixels and kilobytes
An online form says: Upload a photo, JPG, under 200 KB. Your phone’s photo is 4 MB. What now?
First, keep two different sizes apart:
- The size in pixels (its resolution, as you called it in Grade 6): how many pixels across and down, such as 4,000 × 3,000. This decides how much detail the photo can show.
- The file size: how many bytes the saved file takes, such as 4 MB. This decides how long it takes to send and how much space it uses.
They are linked, but not simply. In Grade 7 you worked out that a photo of 4,000 × 3,000 pixels needs 36,000,000 bytes, about 34 MB, at 3 bytes a pixel Grade 7: How big is a photo?. That is its raw size. Yet the phone saves it as a file of about 4 MB. Before saving, the phone compresses the photo: it stores the same picture in far fewer bytes, by cleverly describing areas that are similar instead of listing every pixel, and by leaving out fine detail the eye hardly notices. (How this works is in Grade 9.)
So there are two ways to make a file smaller:
- Fewer pixels: resize. A form, a message or a web page rarely needs 4,000 pixels across. Halving the width and the height leaves a quarter of the pixels, and the file shrinks with them.
- More squeezing: lower the quality. When saving a JPEG or a WebP, many apps offer a quality setting from 0 to 100. Lower quality throws away more detail and makes a smaller file. A little lower barely shows. Much lower, and smudges and small square blocks appear round sharp edges and in smooth sky. These faults are called compression artifacts.
So, to make a photo fit a form’s limit:
- Read what the form asks for: the format (often JPG), the size in pixels (say, 600 × 600), the file size (under 200 KB), sometimes the background and how big the face must be.
- Keep the original, and work on a copy.
- Crop to the shape it asks for.
- Resize to the pixels it asks for, or, if it doesn’t say, to about 1,000 to 1,600 pixels across.
- Save as JPEG at a quality of about 80. Check the file size.
- Still too big? Lower the quality a little at a time. Then look at the photo, zoomed in, to check it is still clear: a face must be recognizable, a document’s words readable.
Choosing a format
You have met several kinds of file. Each was made for a job, and the wrong one can make a file ten times too big, or blur what should be sharp.
The formats that compress fall into two families:
- Lossless compression keeps every pixel, or every sample, exactly. Uncompress it, and you get back exactly what you started with. Good for drawings, screenshots and anything with text.
- Lossy compression throws away detail it judges you won’t notice, so its files are much smaller. You can never get the lost detail back. Good for photos, music and video, which have far more detail than eyes and ears can take in.
| Format | What it holds | Compression | Use it for |
|---|---|---|---|
| JPEG (.jpg) | photos | lossy; you choose the quality | photos to send, share and upload; the one every form and phone accepts |
| PNG (.png) | pictures of pixels | lossless; can be see-through | screenshots, diagrams, logos as pixels, anything with sharp edges or text |
| WebP (.webp) | pictures of pixels | lossy or lossless; can be see-through | web pages: smaller files than JPEG or PNG, but some forms and older apps refuse it |
| SVG (.svg) | a vector picture: shapes (Grade 7) | it is text | logos, icons, diagrams that must be sharp at any size |
| PDF (.pdf) | whole documents: pages of text, pictures and vector drawings | its parts can be either | forms, reports, certificates, scanned pages: anything to print or keep exactly as it looks |
| MP3 (.mp3) | sound | lossy | music, voice recordings, podcasts |
| MP4 (.mp4) | video and its sound together | lossy | video to share and post |
A teacher makes a worksheet with a table, a diagram and two photos, and wants every student’s printout to look exactly like hers. Which format should she share it as?
Pick an answer to see why.
Recording clean sound
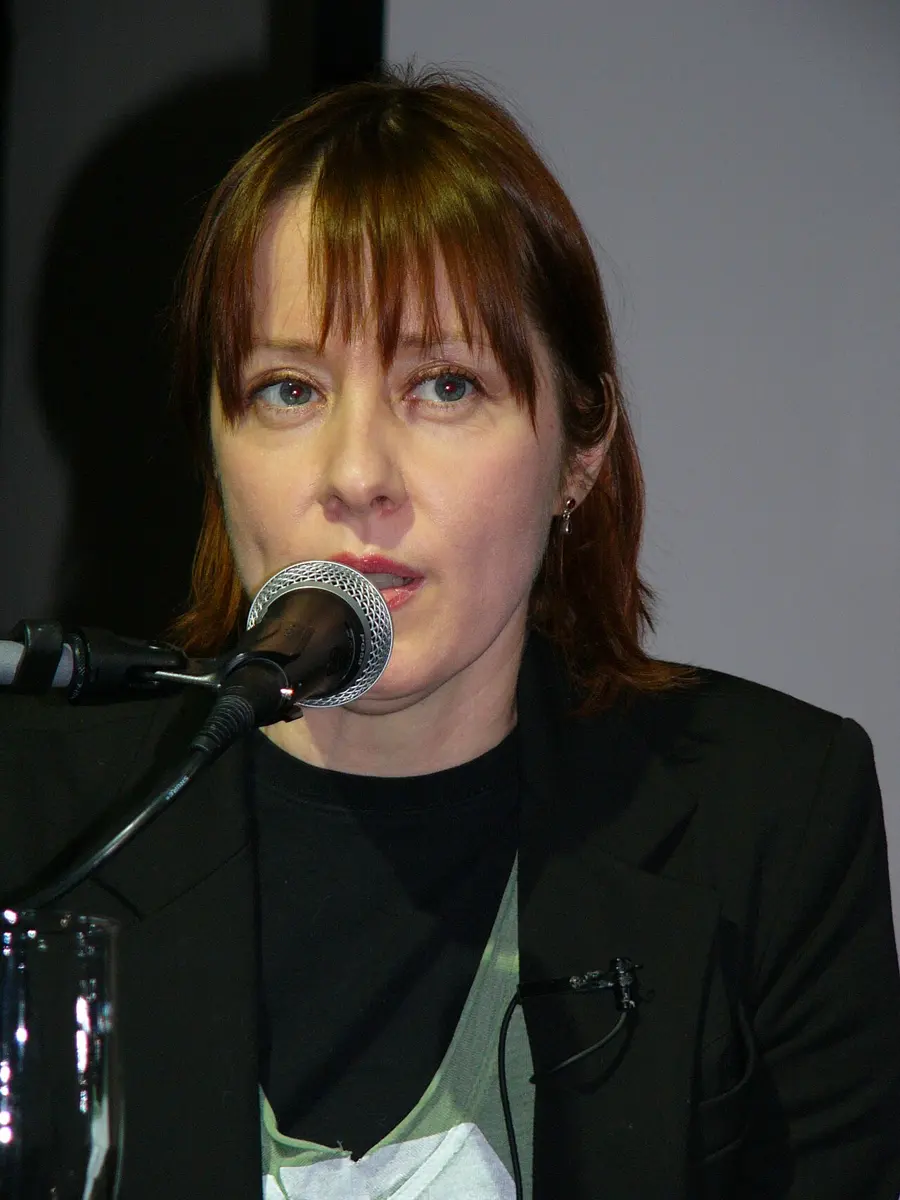
Record a voice on your phone in an ordinary room, and play it back. Often it is hard to listen to: a fan humming underneath, an echo, a thump on every “p”, traffic. Your ears didn’t notice these while you spoke, because your brain picks out the voice and ignores the rest. A microphone picks out nothing. It records everything, as samples (Grade 7, Sound as samples).
What decides how clear a recording is, is how much louder the voice is than everything else at the microphone. Everything else is called noise. Two things matter most:
- The room. A fan, a fridge, a road, other people. And a bare room with hard walls bounces the voice back as an echo. Soft things (curtains, beds, clothes, cushions) soak up the echo.
- How far the mouth is from the microphone. The voice that reaches the microphone gets weaker as you move away: at twice the distance, half as strong. The room’s noise stays the same wherever the phone is.
Phones make this worse in a way you might not expect. Most phones’ recorders set their own level, louder for a quiet voice and softer for a loud one (automatic gain). So moving away doesn’t make the recording quieter: the phone turns itself up, and turns the noise up with it.
So, for a clean recording:
- Choose a quiet place, with soft things in it. Switch off the fan, close the window, ask others for a few quiet minutes. A small room full of clothes and bedding is better than a big bare classroom.
- Get close: about a hand’s width, 15 to 20 cm, from the mouth. Hold the phone a little to the side, so the puffs of air from “p” and “b” go past the microphone, not into it.
- Find the microphone. It is a tiny hole, usually at the bottom edge of the phone. Don’t cover it with a finger or a case.
- Keep still. Rubbing or tapping the phone is loud to its microphone. Rest it on a folded cloth on a table.
- Silence the phone: turn on Do Not Disturb or airplane mode, so a call or a message sound doesn’t spoil the take.
- Outdoors, block the wind with your body or a hand cupped round the microphone. Wind blowing across it roars.
- Test first. Record ten seconds, then listen with earphones. Earphones let you hear the hum and echo that a phone’s small speaker hides.
Making a short video
A short video that people watch to the end is planned before it is filmed, and cut hard after.
Plan
Decide who will watch and where: your class on the school’s screen? Parents on their phones? That decides the shape. A wide 16 : 9 video, filmed with the phone held sideways, fills a screen, a laptop and a video site. A tall 9 : 16 video, filmed upright, fills a phone held upright, as short-video apps show it.
Then write a shot list: the clips you need, in order, with a few words each. For a minute about Sports Day: the field in the morning (3 seconds), the march past (5), the start of the relay (5), the finish and the cheering (8), the prize-giving with the principal speaking (15), a team’s happy faces (4), the empty field at the end (3). Drawn as little boxes, one per shot, a shot list becomes a storyboard.
Film
- Short clips. Film each shot for a few seconds more than you need, then stop. Ten short clips are easier to cut than one long one.
- Steady. Hold the phone with both hands, or rest it on something. Move slowly, or not at all: let the people move.
- Light on the faces, as for photos.
- Sound close to the speaker. For a speech, put a second phone near the speaker, recording, as above.
- Ask first. Everyone who can be recognized in your video should agree to be in it, and parents for younger children (Grade 7, Photos of other people).
Cut
A video editor shows your video as a timeline: time runs from left to right, with your clips in a row, and other tracks under them for words and music. You put the clips in order, then cut away everything dull.
- Trim the start and end of every clip: the wobble as you pressed the button, the moment before anything happened.
- Split a long clip to cut out its middle, or to put something between its parts.
- Keep it short. If a clip is boring to you, who filmed it, it is more boring to everyone else. A minute is long for a video of an event.
- Few effects. A plain cut, from one clip straight to the next, is what most films use. Spinning, sliding and sparkling transitions look like an app showing off.
- A title at the start, credits at the end: what this is, who made it, and whose music, photos or clips you used.
Captions
Captions (Grade 6) are the words spoken in the video, shown on the screen as text. They help people who are deaf or hard of hearing, people watching in a noisy bus or a quiet classroom with the sound off, and people who understand written Nepali or English better than spoken. Write each caption short, no more than two short lines, and keep it on the screen long enough to read twice.
Most editors let you type captions onto the timeline. Many can also save them as a separate caption file, plain text that a video site shows under the video. The commonest kind, SRT, is simple enough to write by hand: a number, the times it starts and ends (hours:minutes:seconds,milliseconds), the words, and an empty line.
sports-day.srt
100:00:09,000 --> 00:00:14,000Good morning, and welcome to Sports Day! 200:00:15,000 --> 00:00:21,000This year, Grade 8 won the relay.Some apps write captions by themselves from the speech. Read every line before you share it: they mishear names, and they make many more mistakes in Nepali than in English.
Music you may use
Music lifts a video, but most songs you know belong to someone, and posting a video is sharing it with the world. Video sites recognize copyrighted songs by their sound, and may mute your video, put someone else’s ads on it, or take it down. Use music whose license allows it (below, Creative Commons in practice), music you made yourself, or none. Keep it quieter than any voice, and turn it down further while people speak.
Words on photos and video
A poster, a video’s title, the small picture a video site shows before anyone presses play (its thumbnail): all of them are words on a picture. The rules of clear design from Grade 6 still hold Grade 6: Three rules of clear design: contrast, size, alignment, space, few fonts. On a photo, the first one is the hard one.
In Unit 5 you measured contrast as a contrast ratio, from 1 : 1 (no difference) to 21 : 1 (black on white), and learned that ordinary text needs at least 4.5 : 1 Grade 8: Pages everyone can use. On a plain background that is easy to check. A photo has light and dark everywhere: white letters that stand out against a dark doorway vanish against a bright sky a few letters later.
There are three good ways to put words on a photo:
- A band of color behind the words, dark behind light letters, or light behind dark. It always works.
- A shadow or a thin outline round the letters, in the opposite tone.
- A calm part of the photo: plain sky, a wall, a road. Or crop the photo to leave such a space for the words.
And a few more habits for anything seen on a phone:
- Big and few. A video’s title or a thumbnail is often seen the size of a stamp. Five words that can be read beat fifteen that can’t.
- Keep away from the edges. Phones round off the corners of the screen, and video apps put their buttons and the video’s name over the bottom and sides.
- Choose colors from the photo. A title in a color that is already in the photo (the red of a flag, the green of the hills) looks as if it belongs. Two or three colors are enough. Never let color alone carry a meaning (Grade 7, Designing for everyone).
- Nepali needs its own font, and a little more size and space between lines than English (Grade 6, Documents in Nepali).
- An honest thumbnail. A thumbnail that promises something the video doesn’t have (“You won’t believe what happened!”) gets clicks once, and loses viewers’ trust for good.
You write a white title on a photo of the school building. Some letters are over a white wall and can’t be read. What is the best fix?
Pick an answer to see why.
Honest editing
Some edits show more clearly what was really there: brighter, straighter, cropped to what matters. Others change what happened: a person removed from a group, a crowd made to look small, words cut so that a speaker seems to say the opposite. Phones now have AI tools that do the second kind in a tap: erase a person, add a sky, make up a whole face. Your edits are honest when someone who was there would say, “Yes, that is what happened”.
You met this in Grade 7: pictures made or changed to fool people, and how to check them Grade 7: Pictures that never happened, and the rule for sharing photos of other people: ask first, and take them down when asked Grade 7: Photos of other people. Unit 10 of this book explains how AI makes fake pictures, voices and videos, called deepfakes. The same rules hold for everything you make:
- If you changed what a photo shows, say so (“edited”, “made with AI”, “a reconstruction”).
- Never edit a real person into something they didn’t do or say, even as a joke.
- Never change an official document: a mark sheet, a certificate, an ID card. That is forgery, a crime.
Creative Commons in practice
In Grade 6 you learned what copyright is, and the Creative Commons licenses that give permission in advance: BY (credit), SA (share alike), NC (not for money), ND (no changes), and CC0 (no conditions) Grade 6: Creative Commons. Now you use them for real, in both directions: using others’ work in yours, and sharing your own.
Using others’ work
For each photo, piece of music or clip that you didn’t make, ask the same three questions: who made it, what license did they give, and does that license allow what I am doing? A video you post online is shared with the whole world, so “just for my friends” doesn’t apply.
A video’s credits go at the end, or in the description under it, in the same four parts as a picture’s credit: what, who, where, which license.
Credits at the end of the video
Filmed and edited by Grade 8 B, Shree Janata Secondary SchoolMusic: “Morning in the Hills”, by A. Gurung, CC BY 4.0, via Wikimedia CommonsPhoto of the old school building: R. Shrestha, used with permission(The music and the photographer here are made up, to show the pattern.)
Sharing your own
Everything you make, you own: the copyright is yours the moment you make it. You can keep all your rights, or choose a license that tells others what they may do, as the photographers whose photos fill this unit did. To choose, ask yourself two questions:
- May others change it and share their version? If you’d rather they didn’t, add ND. If yes, but you want their versions to stay just as open, add SA.
- May others make money with it? If not, add NC.
| You want | Choose |
|---|---|
| anyone to use it for anything, with your name | CC BY |
| the same, and anything made from it shared the same way | CC BY-SA |
| no money made from it by others | CC BY-NC (or CC BY-NC-SA) |
| it shared only as it is | CC BY-ND |
| no conditions at all | CC0 |
Wikipedia and Wikimedia Commons, the places where the most people will see and use a photo, accept only work that anyone may change and use for anything: CC BY, CC BY-SA or CC0. A photo you share as NC or ND can’t go there.
To license your work, say so where it is shared: in the description, or the video’s credits: “© Sita Tamang. Shared under CC BY 4.0.” Two cautions. You can only license what is yours: if your video has someone else’s music in it, that music keeps its own license. And a license on your photo doesn’t give anyone the right to use the faces in it as they like: the people in it still matter.
Why credit matters
Credit can feel like a small thing at the bottom of a page. It is not.
- It is fair. Behind every photo, song and clip is someone’s skill and time. For many photographers and musicians, in Nepal as everywhere, being known by name is how they find their next work. A song reposted without credit sends its listeners, and the money from its views, to someone else.
- It is honest. Credit tells your viewers which parts you made and which you didn’t. Passing off others’ work as yours is plagiarism (Grade 6).
- It lets people check and find more. A credit is a link back to the original (Grade 7’s lateral reading works only if there is something to follow).
- It keeps sharing going. Creative Commons works only because people keep its one condition. Every uncredited use makes creators less willing to share.
- It is the law. Nepal’s Copyright Act, 2059 (2002), like the laws of nearly every country, protects creators’ work and their right to be named as its maker. In Nepal, most work is protected for its maker’s whole life and 50 years after; a photo, for 25 years from when it was taken.
Computing itself runs on this. Programmers share code under licenses too, and the commonest ones ask for one thing in return: keep the author’s name and the license with the code. The page you are reading is a real example. The Python that runs its programs and the block editor of the earlier units were both shared by their makers under open licenses, and its photos come with their photographers’ names. Without people who shared, and people who credited them, it couldn’t have been built.
Project
In short
Exercise
A photo’s histogram has all its pixels bunched in the middle, with none near black or white. What does the photo look like?
Pick an answer to see why.
A phone photo is 4,000 × 3,000 pixels. Which change makes the file smallest while keeping it clear enough for a form?
Pick an answer to see why.
Which file should a school’s logo be kept in, so it can be printed on a badge and on a banner?
Pick an answer to see why.
You record a talk with the phone 2 m from the speaker, in a room with a fan. It sounds noisy. What helps most?
Pick an answer to see why.
Music is shared under CC BY-NC. In which of these may you use it, with credit?
Pick an answer to see why.
Which of these edits changes what happened?
Pick an answer to see why.
Explain what each of these photo-editing tools does to a pixel’s numbers: i. brightness, ii. contrast, iii. saturation, iv. warmth.
Answer
What is clipping in a photo? Why can’t it be undone by editing the photo again? How can you avoid it?
Answer
What is the difference between a photo’s size in pixels and its file size? A form asks for a photo “600 × 600 pixels, under 200 KB”. Which number is which?
Answer
A photo is 3,000 × 2,000 pixels. i. What is its raw size in MB, at 3 bytes a pixel? ii. It is resized to 750 pixels wide, keeping its shape. How many pixels high is it, and what fraction of its pixels are left? iii. What is its raw size now, in KB?
Answer
Explain the steps you would follow to make a photo from your phone fit an online form’s limit of “JPG, under 200 KB”, without making it hard to see.
Answer
What is the difference between lossless and lossy compression? Give one format of each, and say what each is best for.
Answer
Choose the best format for each, and give a reason: i. a photo to upload to a job application, ii. the class routine, made in a word processor, to print for every student, iii. a recording of a poem, iv. a screenshot showing how to change a phone’s setting.
Answer
Your friend records an interview for a school project. Give five things they should do to make the recording clear, with a reason for each.
Answer
A video of a 20-minute speech by a guest at your school is to be shared online. Give three reasons it should have captions.
Answer
What is wrong with each, and how would you fix it? i. A white title written over a photo with bright sky. ii. A video’s title in small letters right in the bottom corner. iii. A thumbnail saying “Shocking!” for a video of the school’s prize-giving.
Answer
Copy and complete the table: may you use the music as a video’s soundtrack, posted online, with credit?
| Music’s license | Your video | Allowed? |
|---|---|---|
| CC BY | a school project | |
| CC BY-NC | an advertisement for a shop | |
| CC BY-ND | a school project | |
| CC0 | anything | |
| no license shown | a school project |
Answer
You have made a photo of Phewa Lake that you are proud of. You would like anyone, including Wikipedia, to be able to use it, as long as they say you took it. Which Creative Commons license should you choose, and why not CC BY-NC? Write the line you would put under the photo.
Answer
Why is it important to give credit when you use someone else’s photo, music or code in something you make? Give four reasons, with an example of each.
Answer
Quiz yourself: Creating, Grades 6–12 →
Practice every question in the book, and keep track of the ones you miss →